
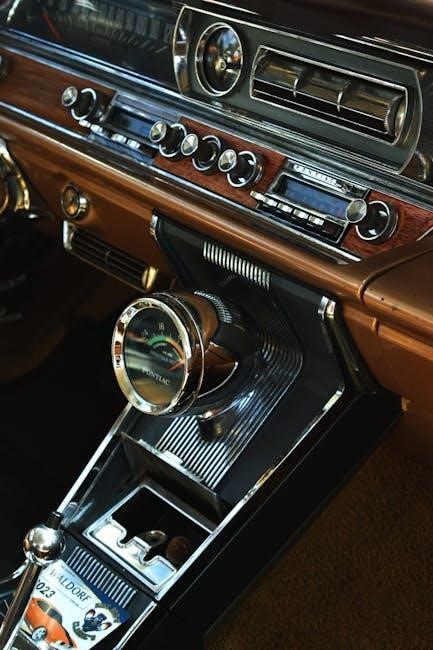
Welcome to the JVC Car Stereo User Manual.
This guide provides essential information for safe and effective operation of your car audio system.
Enjoy your enhanced driving experience.
Purpose and Scope of the Manual
This manual is designed to guide users in safely installing‚ operating‚ and maintaining their JVC car stereo system. It covers essential steps for installation‚ basic operations‚ and advanced features like Bluetooth connectivity and EQ settings. Intended for both new users and professional installers‚ the manual ensures optimal performance and longevity of the system. Detailed troubleshooting tips and technical specifications are included to address common issues and provide clarity on compatibility. By following this guide‚ users can enjoy enhanced audio experiences while adhering to safety precautions and proper usage guidelines.
Important Safety Precautions
Always prioritize safety when using your JVC car stereo.
Never install or operate the system while driving‚ as it may cause distractions.
Ensure proper grounding to avoid electrical interference or damage.
Avoid exposing the unit to extreme temperatures or moisture.
Follow all local regulations for in-car audio systems.
Keep flammable materials away from the stereo.
Disconnect the battery before performing any installations or repairs.
Read all instructions carefully and consult a professional if unsure.
These precautions ensure safe and optimal use of your JVC car stereo system.

Installation and Setup
Ensure a clean‚ dry environment for installation.
Use proper tools to avoid damage.
Disconnect the battery before starting.
Follow the step-by-step guide for wiring and connections.
Consult a professional if unsure about complex steps.
Proper setup ensures smooth operation and optimal performance.
Pre-Installation Checklist
Before starting‚ ensure you have all necessary tools and components.
Verify compatibility with your vehicle’s make and model.
Check power requirements and wiring harness compatibility.
Inspect the dashboard for adequate mounting space.
Ensure the parking brake is engaged for safety.
Disconnect the battery to prevent electrical shocks.
Review the installation manual thoroughly.
Prepare additional accessories like adapters or brackets.
Gather a screwdriver‚ pliers‚ and wire strippers.
Test all components before installation.
Consult a professional if unsure about any step.
Step-by-Step Installation Guide
Power off the vehicle and disconnect the battery.
Remove the old stereo by taking out the mounting screws.
Connect the wiring harness to the new JVC stereo.
Secure the stereo in the dashboard using the provided mounting kit.
Reconnect the battery and test the system.
Ensure all buttons and functions work properly.
Tighten all connections and screws for stability.
Refer to the manual for specific wiring diagrams.
Test Bluetooth‚ USB‚ and audio inputs.
Enjoy your newly installed JVC car stereo system.
Connecting Speakers and Wiring
Connect the speaker wires to the stereo’s corresponding terminals.
Ensure proper polarity: positive to positive‚ negative to negative.
Use the wiring harness for a secure connection.
For non-matching systems‚ adapters may be required.
Route wires neatly to avoid interference.
Test each speaker to confirm proper function.
Check for any loose connections or short circuits.
Refer to the wiring diagram in the manual.
Power on the system and adjust settings.
Enjoy clear and balanced audio performance.

Basic Operations
Learn to operate your JVC car stereo with ease.
Turn it on/off using the power button.
Adjust the volume with the control knob.
Navigate through the menu using the interface.
Select sources like radio‚ USB‚ or Bluetooth.
Turning the Stereo On/Off
To turn the JVC car stereo on‚ press the power button located on the front panel. The display will illuminate‚ and the system will start up. To turn it off‚ press and hold the same button until the display turns off. Ensure the ignition is in the “on” position for proper operation. The stereo will automatically turn off when the ignition is switched off. Always stop the car before operating the stereo to avoid distractions. Refer to the manual for additional power management features and settings. Proper use ensures optimal performance and longevity of your system.
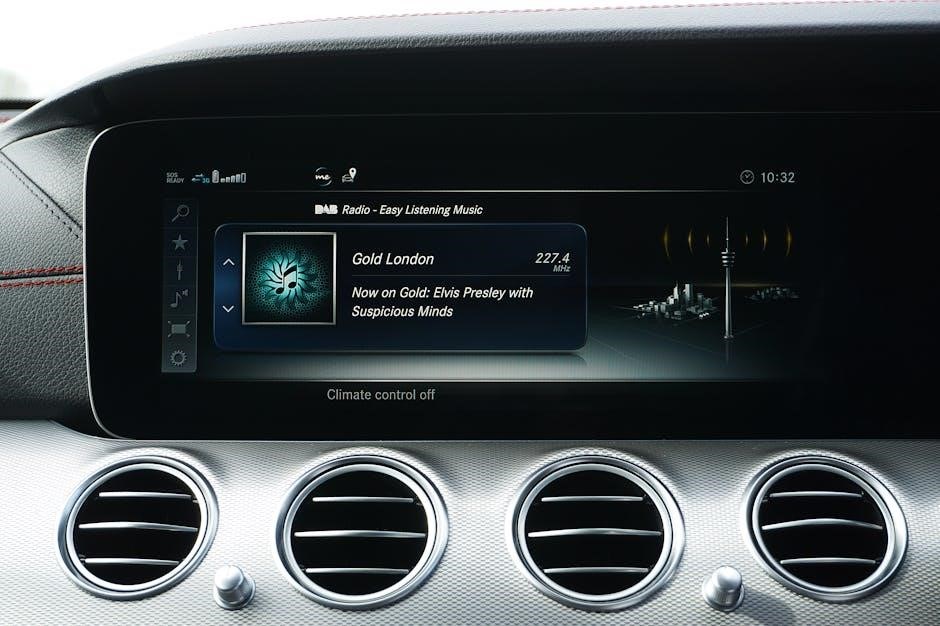
Navigating the Menu System
Navigate the JVC car stereo menu using the control buttons and knobs. Press the “Menu” button to access the main menu. Use the rotary knob to scroll through options and press it to select. The arrow keys on the remote can also be used for navigation. The menu is intuitive‚ with options like audio settings‚ EQ‚ and Bluetooth connectivity. Sub-menus appear when selecting specific features. Ensure the car is stationary before adjusting settings to avoid distractions. The system is designed for easy operation‚ allowing you to customize your listening experience efficiently while driving.
Adjusting Volume and Sound Settings
Adjust the volume using the volume knob or the remote control. Press the “Vol” button to display volume settings. Use the rotary knob to increase or decrease the volume. For sound settings‚ press the “Menu” button and navigate to “Audio Settings.” Adjust bass‚ treble‚ and balance using the control buttons. Select “EQ” to customize sound preferences. Save your settings by pressing “Enter.” Ensure volume levels are moderate to avoid distraction while driving. The system allows precise control over audio output for an enhanced listening experience.
Advanced Features
Explore advanced features like Bluetooth connectivity‚ USB‚ CD playback‚ and EQ customization. Enhance your driving experience with seamless smartphone integration and personalized audio settings.
Using Bluetooth Connectivity
Your JVC car stereo supports Bluetooth connectivity for wireless audio streaming and hands-free calls. Pair your smartphone to enjoy seamless music playback and voice commands. Use the JVC MUSIC PLAY app for Android devices to control music directly from the stereo. Ensure your device supports Bluetooth profiles like A2DP and AVRCP for optimal performance. Once paired‚ you can stream audio‚ manage calls‚ and access voice assistants. Refer to your smartphone’s settings to complete the pairing process and enhance your driving experience with wireless freedom.
Playing Media Files (USB‚ CD‚ etc.)
Your JVC car stereo supports various media formats‚ including MP3‚ WMA‚ and AAC files via USB or CD. Connect your USB device to the designated port or insert a CD to begin playback. Use the menu system to select the desired source and navigate through your media library. Supported formats are displayed automatically‚ ensuring smooth operation. For USB playback‚ ensure your files are properly organized in folders. The stereo also supports auxiliary input for external devices‚ enhancing your audio experience. Refer to the compatibility list for supported file formats and enjoy seamless media playback on the go.
Setting Up EQ and Audio Preferences
Your JVC car stereo allows you to customize audio settings for an optimal listening experience. Use the EQ (Equalizer) to adjust bass‚ treble‚ and midrange levels to your preference. Select from preset options like “Rock‚” “Jazz‚” or “Vocal” for tailored sound. You can also manually fine-tune settings for a more personalized audio profile. Access these options via the menu system under “Audio Settings” or “EQ.” Adjustments can be made while playing music to ensure the best sound quality. Experiment with different configurations to enhance your in-car audio experience.

Connectivity and Compatibility
This section covers Bluetooth‚ USB‚ CD‚ and auxiliary input options‚ ensuring seamless integration with various devices. Compatible with iPod‚ iPhone‚ and Android‚ it supports multiple audio formats for enhanced connectivity.
Pairing Your Smartphone
To pair your smartphone with the JVC car stereo‚ enable Bluetooth on both devices. Ensure your phone is in discoverable mode and select the stereo’s name from the available devices list. For Android devices‚ download the JVC MUSIC PLAY app from the Play Store to enhance connectivity. Once paired‚ you can stream music‚ take calls‚ and control playback directly from the stereo. Refer to your phone’s settings or the manual for specific pairing instructions. This feature ensures seamless integration for an enhanced driving experience.
Auxiliary Input and Output Options
Your JVC car stereo features multiple auxiliary input and output options for versatile connectivity. Use the rear auxiliary input to connect external devices like MP3 players or gaming consoles. The RCA pre-output terminals allow for easy connection to external amplifiers or processors. Additionally‚ the USB port supports charging and data transfer for compatible devices. For older devices‚ the 3.5mm auxiliary input ensures compatibility. These options provide flexible ways to enhance your car audio experience‚ ensuring seamless integration with a wide range of audio sources.
Customization and Settings
Customize your JVC car stereo to suit your preferences.
Adjust display settings for brightness and color.
Set EQ preferences for optimal sound quality.
Configure audio output options for enhanced performance.
Personalize your driving experience with ease.
Personalizing Display Settings
Personalize your JVC car stereo’s display to enhance your driving experience.
Adjust brightness levels to suit daytime or nighttime driving conditions.
Change the display color to match your car’s interior or personal preference.
Enable or disable illumination features to reduce glare or conserve power.
You can also set the display to automatically dim when the car’s headlights are on.
These settings are easily accessible through the menu system‚ allowing you to customize your stereo’s appearance.
Refer to the manual for step-by-step guidance on adjusting these display settings.
Configuring Audio Output Options
Configuring audio output options on your JVC car stereo allows for a tailored listening experience.
Access the audio settings through the menu system to adjust features like equalizer presets‚ bass‚ and treble.
Customize sound balance between front and rear speakers for optimal acoustic performance.
Explore options for connecting external devices‚ such as amplifiers or subwoofers‚ to enhance sound quality.
Set volume limits or prioritize audio sources like Bluetooth or USB for seamless playback.
Refer to the manual for step-by-step guidance to ensure proper configuration and avoid sound distortion.
Consider updating firmware for additional features and improved performance.
Maintenance and Troubleshooting
Regularly clean the stereo and connectors to ensure proper functionality.
Refer to troubleshooting guides for common issues like connectivity problems or sound distortion.
Update firmware for optimal performance and bug fixes.
Cleaning and Care Tips
Regularly clean the stereo’s exterior with a soft‚ dry cloth to prevent dust buildup.
Avoid using harsh chemicals or abrasive materials that may damage the finish.
Gently wipe the touchscreen with a microfiber cloth to maintain responsiveness.
For the CD player‚ use a cleaning disc to remove dust and debris.
Inspect and clean connectors to ensure proper connectivity.
Avoid extreme temperatures and moisture to preserve component longevity.
For stubborn stains‚ dab with a lightly dampened cloth but avoid liquids entering openings.
Polish the display periodically to reduce fingerprints and smudges.
Store the manual in a dry place for future reference.
Technical Specifications
Power output: 50W x 4 channels‚ voltage range: 10.5V–16V DC.
Supported audio formats: MP3‚ WMA‚ AAC‚ FLAC‚ and WAV.
Frequency response: 20Hz–20kHz‚ SNR: 80dB.
Compatible with iPod‚ iPhone‚ and Android devices via USB.
Power Output and Voltage Requirements
The JVC car stereo delivers a maximum power output of 50W x 4 channels‚ ensuring clear and powerful sound across all speakers; It operates within a voltage range of 10.5V–16V DC‚ making it compatible with most vehicle electrical systems. The unit is designed to handle a maximum power supply of 20A to support high-quality audio performance; For optimal functionality‚ ensure your car’s electrical system meets these specifications. Proper installation is crucial to avoid damage and ensure safe operation. Always consult a professional if unsure about wiring or voltage requirements.
Supported Audio Formats
The JVC car stereo supports a wide range of audio formats‚ including MP3‚ WMA‚ WAV‚ and FLAC‚ ensuring compatibility with most digital music libraries. It also plays CDs‚ CD-R‚ and CD-RW discs with MP3 or WMA files. For high-quality audio‚ select models support AAC and DAB (Digital Audio Broadcasting) formats. The system is designed to handle various file types‚ providing versatility for different listening preferences. Always check the manual for specific model capabilities‚ as supported formats may vary. This ensures a seamless and enjoyable listening experience for all users.

Accessories and Upgrades
Enhance your JVC car stereo experience with recommended accessories like DAB tuners‚ wiring kits‚ and upgraded speakers. For improved sound quality‚ consider additional amplifiers or subwoofers.
Recommended Accessories
Enhance your JVC car stereo system with accessories like DAB tuners for digital radio‚ high-quality wiring kits‚ and backup cameras for improved safety. Additionally‚ consider investing in a phone mount for convenient navigation and a USB extension cable for easy media connectivity. These accessories ensure optimal performance and convenience‚ elevating your driving experience.
- DAB tuners for crystal-clear digital radio reception.
- High-quality speaker wires for seamless audio transmission.
- Backup cameras for enhanced rear visibility and safety.
- Phone mounts for hands-free navigation and calls.
- USB extension cables for convenient media playback.
Upgrade Options for Enhanced Performance
To elevate your JVC car stereo system‚ consider upgrading with a DAB tuner for digital radio‚ advanced amplifiers for improved sound quality‚ or a high-capacity USB interface for faster media access. Installing a dedicated subwoofer or premium speakers can also enhance audio performance. Additionally‚ updating the firmware ensures compatibility with the latest devices and features. These upgrades offer a seamless and powerful entertainment experience.
- DAB tuner for digital radio reception.
- Amplifiers to boost sound quality and power.
- High-performance speakers for clearer audio.
- Firmware updates for enhanced compatibility.

Warranty and Support
Your JVC car stereo comes with a comprehensive warranty covering parts and labor for a specified period. For support‚ contact JVC’s customer service or visit their official website for assistance.
- Warranty details provided in the manual.
- 24/7 customer support available online.
- Authorized service centers for repairs.
Understanding Your Warranty
Your JVC car stereo is backed by a limited warranty covering manufacturing defects in materials and workmanship. The warranty period typically begins from the purchase date and varies by region. It includes repair or replacement of defective parts at no additional cost. For details‚ refer to the warranty section in your manual. Keep your purchase receipt as proof of ownership‚ as it may be required for warranty claims. Contact JVC support or visit their website for assistance with warranty-related inquiries.
- Coverage varies depending on your location.
- Warranty does not cover misuse or third-party modifications.
- Authorized service centers handle warranty repairs.
Contacting JVC Support
For assistance with your JVC car stereo‚ visit the official JVC website and navigate to the support page. You can submit inquiries‚ download manuals‚ or find authorized service centers. Regional support contact details are also available. When reaching out‚ have your product model and serial number ready for faster assistance. JVC support is available to address warranty claims‚ technical issues‚ or installation questions. For non-warranty repairs‚ contact your local authorized service provider. Visit https://www.jvckenwood.com/ for more information.
- Website: https://www.jvckenwood.com/
- Support page: Manuals‚ FAQs‚ and contact forms.
- Authorized service centers for repairs.
No Responses