
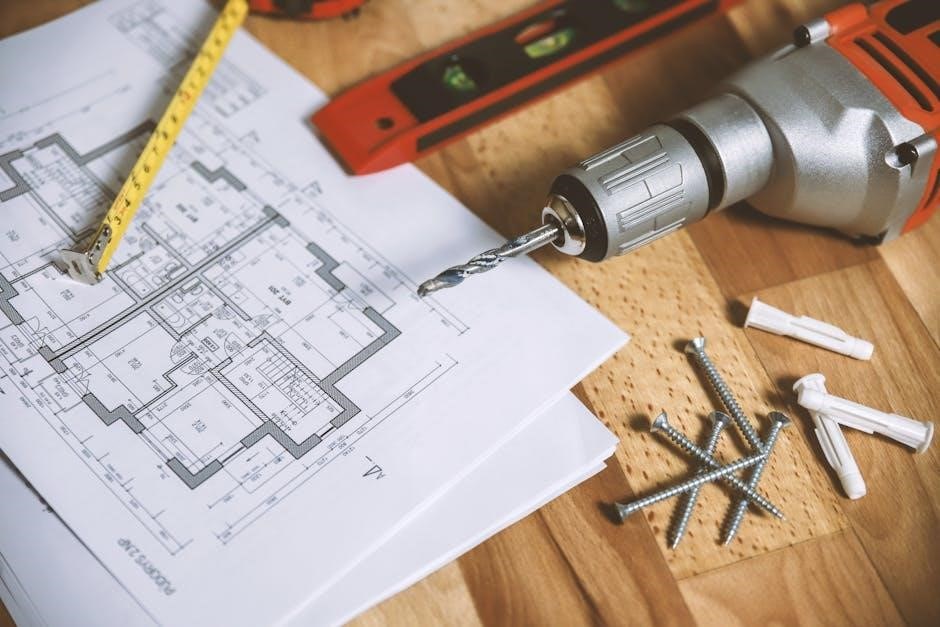
A manual garage door parts diagram is an essential tool for understanding the components of your garage door system. It provides a visual guide to identify key parts like springs, tracks, rollers, and hinges. This diagram helps homeowners and technicians troubleshoot issues, perform maintenance, and replace worn-out parts. By referencing the diagram, you can ensure proper functionality and safety of your manual garage door system.
H2: Key Components of a Manual Garage Door
A manual garage door system consists of several essential components that work together to ensure smooth operation. Understanding these parts is crucial for maintenance, troubleshooting, and repairs. Below are the key components of a manual garage door:
- Door Panels: These are the visible sections of the garage door that form its structure. Made from materials like steel, wood, or aluminum, they are designed to be durable and provide insulation.
- Tracks: The horizontal and vertical tracks guide the door as it opens and closes. Proper alignment of these tracks is vital for smooth operation.
- Springs: Torsion or extension springs counterbalance the weight of the door, making it easier to lift manually. These springs are under tension and require careful handling.
- Hinges: Connecting the door panels, hinges allow the sections to flex as the door moves along the tracks.
- Rollers: Attached to the door, rollers glide along the tracks, reducing friction during opening and closing.
- Cables: These connect the door to the springs, helping to lift and lower the door safely.
- Handle: Located on the outside or inside of the door, the handle provides a grip for manual operation.
Each component plays a critical role in the functionality of a manual garage door. Regular inspection and maintenance of these parts ensure longevity and safe operation. Referencing a parts diagram can help identify and locate each component for easier servicing.

H2: Exploded Parts Diagram: A Visual Guide
An exploded parts diagram is a detailed visual representation of all the components of a manual garage door system. This diagram is essential for understanding how each part fits together and functions within the overall system. It is particularly useful for homeowners, technicians, and DIY enthusiasts who need to identify, repair, or replace specific components.
The diagram typically displays each part of the garage door separately, labeled with its corresponding name and reference number. This makes it easier to locate and understand the role of each component. Key elements often highlighted in an exploded parts diagram include:
- Torsion Springs: These are shown as coiled springs attached to the torsion bar, illustrating their role in counterbalancing the door’s weight.
- Tracks: The horizontal and vertical tracks are depicted in their assembled and disassembled forms, showing how they guide the door’s movement.
- Rollers: The rollers and their attachment points are clearly visible, demonstrating how they interact with the tracks.
- Hinges: The hinges connecting the door panels are shown in detail, highlighting their flexibility and importance in the door’s movement.
- Cables: The cables and their connections to the springs and bottom brackets are illustrated, emphasizing their critical role in lifting the door.
- Door Panels: The individual panels are displayed, showing how they are connected and secured to form the complete door structure.
By referencing an exploded parts diagram, users can easily identify worn or damaged components and understand how they need to be replaced or adjusted. This visual guide is also invaluable for ordering replacement parts, as it provides clear identification numbers and descriptions. Whether you’re performing routine maintenance or addressing a specific issue, an exploded parts diagram is an indispensable resource for working with manual garage doors.

H2: Troubleshooting Common Issues
Troubleshooting common issues with a manual garage door can be made easier by referencing a parts diagram. Identifying the root cause of the problem is the first step toward resolving it. One of the most frequent issues is a door that refuses to open or close smoothly. This is often due to worn-out rollers or misaligned tracks. Inspecting these components using the diagram can help pinpoint where the problem lies.
Another common issue is a door that feels heavy or difficult to lift. This could indicate a problem with the torsion springs, which provide the necessary force to counterbalance the door’s weight. If the springs are damaged or stretched, they may need to be replaced. The diagram can help identify the correct springs for your specific door model.
Broken or loose hinges are another frequent problem. Hinges connect the door panels and allow the door to flex as it moves along the tracks. If hinges are damaged, the door may sag or fail to align properly. Using the diagram, you can locate the exact hinges that need replacement and ensure they are securely fastened.
Additionally, frayed or snapped cables can cause the door to malfunction. These cables are attached to the springs and bottom brackets, playing a crucial role in lifting the door. A parts diagram can guide you in assessing the condition of these cables and determining if they need to be replaced.
Regular maintenance, such as lubricating rollers and hinges, can prevent many of these issues. By referencing the parts diagram, you can ensure that all components are properly inspected and maintained. Addressing problems early can prevent more costly repairs down the line and keep your manual garage door functioning smoothly.
H2: Maintenance and Care Tips
Regular maintenance is crucial to ensure the smooth operation and longevity of your manual garage door. By following a few simple care tips, you can prevent common issues and keep your door functioning like new. Start by lubricating all moving parts, such as hinges, rollers, and springs, using a silicone-based lubricant. This will reduce friction and prevent rust from forming.
Inspect the door tracks regularly to ensure they are free from dirt, debris, and grease buildup. Clean the tracks with a soft cloth or brush, and avoid using harsh chemicals that could damage the metal. Properly aligned tracks are essential for smooth door movement, so check for any signs of misalignment and adjust them if necessary.
Check the condition of the torsion springs, cables, and rollers. If you notice any signs of wear, such as frayed cables or corroded springs, address the issue promptly. Worn-out parts can lead to safety hazards and costly repairs if left unattended. Refer to your manual garage door parts diagram to identify and replace damaged components accurately.
Weatherstripping around the door edges helps seal gaps and protect against drafts and pests. Inspect the weatherstripping for cracks or tears and replace it as needed. Additionally, tighten any loose screws or bolts on the door and its frame to ensure stability and proper alignment.
Finally, perform a periodic balance test on your door. Open the door halfway and release it. If it stays in place without drifting up or down, the springs are balanced. If not, consider consulting a professional to adjust the tension. Regular maintenance not only extends the lifespan of your garage door but also enhances safety and efficiency.

H2: Safety Guidelines for Manual Doors
Ensuring safety when operating and maintaining a manual garage door is paramount. Always begin by understanding the door’s mechanics, particularly the torsion springs, which are under high tension and can cause serious injury if mishandled. Before performing any maintenance, familiarize yourself with the components using a manual garage door parts diagram to identify potential hazards accurately.
Use the release cord judiciously. It is designed to disengage the door from the opener for manual operation, especially in emergencies. However, pulling it while the door is moving can lead to accidents. Always ensure the door is fully open or closed before using the release cord. Additionally, keep the area around the door clear of obstacles, children, and pets to prevent accidents during operation.
Regular inspections are crucial. Check for worn-out parts, frayed cables, or loose bolts. Use the parts diagram to locate and assess each component. If you find any damage, address it promptly to prevent further issues. Never attempt to adjust torsion springs without proper tools and knowledge, as they can snap and cause severe injury.
Avoid risky practices, such as trying to stop a falling door or attempting repairs without proper guidance. In case of a malfunction, exit the area and seek professional assistance. Emergency preparedness is key; know what steps to take if the door malfunctions unexpectedly.
Lastly, recognize when a problem exceeds your DIY capabilities. If unsure about any aspect of door maintenance or repair, consult a professional to ensure safety and proper functionality; Remember, safety should never be compromised, and regular checks can prevent many potential hazards.
H2: The Release Cord: Function and Safety
The release cord is a critical component of a manual garage door system, designed to provide an emergency disengagement option. Its primary function is to allow the door to operate manually when the automatic opener is not in use due to a power outage or malfunction. By pulling the release cord, the opener disengages from the door, enabling you to open or close it manually. This feature ensures accessibility and control, even in unexpected situations.
Understanding the release cord’s operation is essential for safe usage. Typically located near the opener, the cord is easily accessible but should be handled with care. When pulled, it releases the door from the opener’s mechanism, transferring control to manual operation. However, improper use can lead to accidents, such as the door falling or moving unpredictably. Always ensure the door is stationary and supported before disengaging the opener.
Safety precautions are vital when using the release cord. Avoid pulling it while the door is in motion, as this can cause sudden stops or uncontrolled movement. Additionally, never use the cord as a substitute for proper door maintenance. If the door is difficult to open manually, it may indicate an issue with the spring system or other components, which should be addressed promptly. Regular inspections of the cord and opener mechanism are recommended to ensure reliable performance.

H2: Identifying Parts Using the Diagram
Identifying parts using a manual garage door parts diagram is a straightforward process that helps you understand the components of your garage door system. The diagram provides a visual representation of each part, making it easier to locate and identify them. Start by examining the overall layout of the diagram, which typically includes the door panels, tracks, springs, rollers, hinges, and the opener mechanism.
Begin by identifying the door panels, which form the structural framework of the garage door. These panels are usually labeled clearly in the diagram and are connected by hinges. Next, locate the tracks, which are the horizontal and vertical rails that guide the door’s movement. The rollers or wheels are attached to the door and move along the tracks, enabling smooth operation.
The springs are another crucial component, providing the necessary tension to lift and lower the door. In a manual system, torsion springs are commonly used. Look for the cables that connect the springs to the door, as they play a key role in distributing the force evenly. Additionally, identify the brackets that secure the tracks and springs to the door frame and ceiling.
Referencing the diagram, locate the release cord, which is typically near the opener. This cord allows manual disengagement of the opener, enabling you to open or close the door without automatic assistance. For added clarity, labels or icons in the diagram will help you distinguish between different parts and their functions;
By systematically identifying each component, you can better understand how your manual garage door operates. This knowledge is essential for troubleshooting, maintenance, and repairs. Always cross-reference the diagram with your actual door to ensure accuracy and familiarize yourself with the parts before attempting any adjustments or replacements.
H2: Conclusion
Understanding the manual garage door parts diagram empowers homeowners to take charge of their door’s upkeep, reducing the need for professional assistance. Regular inspections of springs, tracks, and rollers can prevent minor issues from escalating into major repairs. Additionally, the diagram’s visual cues help in identifying wear and tear early, promoting a proactive approach to maintenance.
For those unfamiliar with garage door mechanics, the diagram acts as an educational tool, demystifying the complex interplay of components. It also serves as a reference for ordering replacement parts, ensuring compatibility and correctness. Moreover, the release cord’s function is clarified, emphasizing its role in manual operation during emergencies or power outages.
No Responses