A well-organized dental tray setup is essential for efficient dental procedures‚ ensuring all necessary instruments are readily available. This guide provides step-by-step instructions and best practices for creating effective tray setups‚ emphasizing organization‚ sterility‚ and workflow optimization. Mastering this skill enhances patient care and operational efficiency in any dental setting.
1.1 Importance of Proper Tray Setup
Proper tray setup is crucial for maintaining efficiency‚ patient safety‚ and infection control during dental procedures. A well-organized tray ensures all necessary instruments are easily accessible‚ reducing delays and stress. It also minimizes the risk of contamination by keeping instruments sterile and within reach. Proper setup enhances workflow‚ allowing dental assistants to focus on patient care without interruptions. Additionally‚ it helps in maintaining a clean and professional environment‚ which is essential for patient confidence. By prioritizing tray organization‚ dental teams can streamline procedures‚ reduce errors‚ and improve overall outcomes. This foundational skill is vital for ensuring smooth and successful dental operations.
1.2 Benefits of Efficient Tray Organization
Efficient tray organization significantly enhances dental practice operations by saving time and improving productivity. A well-structured tray ensures quick access to instruments‚ reducing downtime between procedures. This organization also promotes better infection control‚ as instruments remain sterile and are less likely to be misplaced. Streamlined workflows allow dental assistants to focus on patient care‚ enhancing overall safety and satisfaction. Additionally‚ efficient tray setup reduces the risk of errors‚ ensuring that all necessary tools are available when needed. This systematic approach not only boosts team morale but also contributes to a more professional and organized dental environment‚ ultimately benefiting both practitioners and patients. Proper organization is key to a smooth and efficient dental workflow.
Basic Components of a Dental Tray
A dental tray typically includes essential instruments like mouth mirrors‚ explorers‚ cotton pliers‚ and specific tools for procedures. These components are organized by function for easy access.
2.1 Essential Instruments for Initial Setup
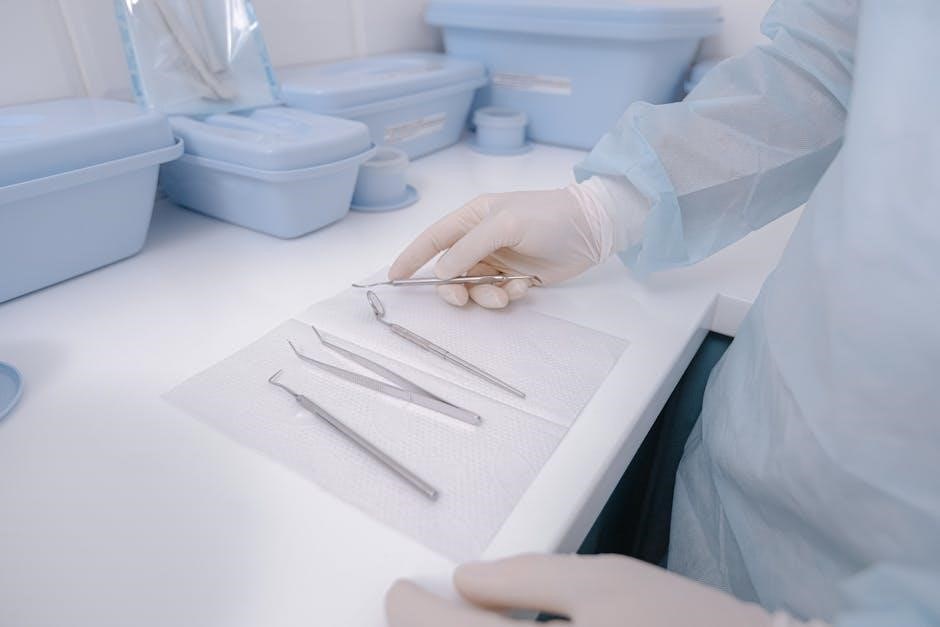
The basic tray setup begins with essential instruments like the mouth mirror‚ explorer‚ and cotton pliers. These tools are fundamental for diagnosing and performing initial patient care. The mouth mirror provides clear visibility of the oral cavity‚ while the explorer helps detect areas of decay or irregularities. Cotton pliers are used to handle and transfer cotton rolls or other materials. These instruments are typically placed on the left side of the tray for easy access. They form the foundation of any dental procedure‚ ensuring efficiency and precision. Their proper placement and organization are critical for a seamless workflow during examinations and treatments.
2.2 Role of the Mouth Mirror‚ Explorer‚ and Cotton Pliers
The mouth mirror is a cornerstone instrument‚ providing clear visibility and magnification of the oral cavity; The explorer is essential for detecting decay or irregularities on tooth surfaces. Cotton pliers‚ meanwhile‚ are used to handle and transfer cotton rolls or other materials during procedures. Together‚ these instruments enable precise diagnostics and efficient patient care. Their strategic placement in the tray ensures they are always within easy reach‚ streamlining the dental assistant’s workflow and enhancing overall procedural efficiency. Proper use of these tools is vital for effective communication between the dentist and dental assistant‚ ensuring accurate assessments and timely interventions.
2.3 Additional Items for Specific Procedures
Beyond the basic setup‚ additional instruments are included based on the specific procedure. For example‚ surgical trays may require suture materials‚ scalpels‚ or surgical needles‚ while operative trays might include carvers‚ polishers‚ or matrices. These items are selected to meet the unique demands of the procedure‚ ensuring efficiency and precision. The dental assistant must anticipate the dentist’s needs‚ adding relevant tools such as impression trays‚ bite registration materials‚ or anesthesia syringes. Proper organization of these items within the tray is crucial‚ allowing seamless access during the procedure. Customizing the tray for specific cases enhances workflow and ensures all necessary supplies are readily available‚ supporting effective patient care. This step highlights the importance of preparation and adaptability in tray setup.
Instruments Grouping and Organization
Grouping instruments by function and arranging them logically in the tray ensures efficiency and easy access. This organization enhances workflow‚ allowing the dental team to focus on patient care.
3.1 Grouping Instruments by Function
Grouping instruments by function ensures logical organization‚ enhancing efficiency during dental procedures. Instruments like carvers and excavators are placed together‚ while diagnostic tools such as mouth mirrors and explorers are grouped separately. Cotton supplies are typically arranged across the tray’s top for easy access. This methodical approach streamlines workflows‚ allowing dental assistants to quickly locate and retrieve instruments‚ minimizing downtime. Proper grouping also helps maintain sterility and reduces the risk of cross-contamination‚ ensuring a safe and effective dental setup. This systematic arrangement is a cornerstone of effective tray setup‚ contributing to seamless patient care and operational efficiency.
3.2 Logical Placement of Instruments in the Tray
Logical placement of instruments in the tray enhances workflow efficiency and ensures easy access during procedures. The basic setup‚ including the mouth mirror‚ explorer‚ and cotton pliers‚ is typically positioned on the left side for quick retrieval. Additional instruments are arranged according to their intended use‚ with similar tools grouped together to minimize distractions. Cotton supplies are often placed across the top of the tray for convenient access. This organized approach streamlines the dental assistant’s workflow‚ reducing downtime and ensuring all necessary items are within reach. Proper placement also supports infection control by maintaining instrument sterility and preventing cross-contamination.
3.4 Arranging Cotton Supplies
Cotton supplies‚ such as cotton rolls‚ pellets‚ and 2×2 gauze‚ are typically arranged across the top of the tray for easy access. This placement ensures that the dental assistant can quickly retrieve the necessary items without disrupting the workflow. Cotton rolls are often positioned on one end‚ while pellets and gauze are organized alongside them. This logical arrangement prevents contamination and keeps the tray tidy. Proper organization of cotton supplies is crucial for maintaining efficiency and sterility during dental procedures. By grouping these items together‚ the dental team can focus on the procedure without unnecessary delays‚ ensuring a smooth and effective workflow.
Step-by-Step Tray Setup Process
Begin with the basic setup‚ adding procedure-specific instruments next. Ensure all items are sterile and logically arranged. Complete with a final check for completeness and readiness.
4.1 Preparing the Tray for Different Procedures
Preparing the tray for different procedures involves customizing the setup based on the specific needs of the treatment. For hygiene procedures‚ include scalers‚ curettes‚ and polishing instruments. Operative trays require handpieces‚ burs‚ and restorative materials. Surgical trays need sutures‚ scalpels‚ and gauze. Always start with the basic setup—mouth mirror‚ explorer‚ and cotton pliers—on the left side. Add procedure-specific instruments logically‚ grouping similar tools together. Ensure all items are sterile and within easy reach. Arrange cotton supplies across the top for quick access. Verify the tray’s completeness before the procedure begins to ensure efficiency and patient safety. This step-by-step approach ensures every tool is ready for use.
4.2 Starting with the Basic Setup
Begin by placing the essential instruments on the left side of the tray‚ as this is typically the most accessible area for the dentist. Start with the mouth mirror‚ explorer‚ and cotton pliers‚ as these are fundamental for most procedures. The mouth mirror provides visibility‚ while the explorer and cotton pliers assist in examining and manipulating materials. Ensure these tools are clean‚ sterilized‚ and ready for use. Proper placement is key to maintaining efficiency during procedures. Grouping instruments by function ensures easy access and streamlines workflow. This foundational setup creates a logical base for adding procedure-specific items later.
4.3 Adding Procedure-Specific Instruments
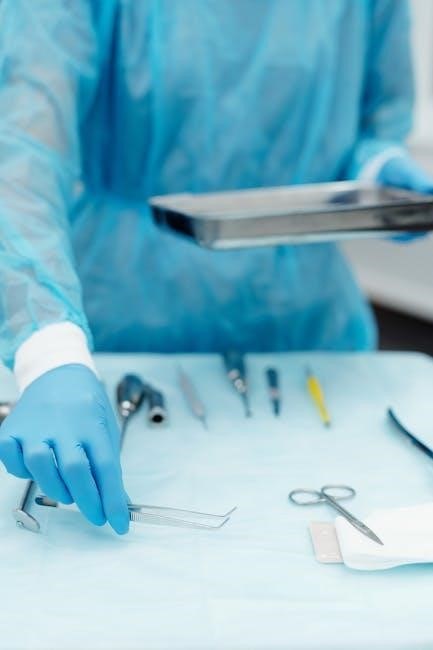
After establishing the basic setup‚ add instruments tailored to the specific procedure. For hygiene procedures‚ include scalers and curettes. Operative procedures may require drills or burs‚ with carvers grouped together for restorative work. Surgical trays should incorporate sutures‚ needles‚ and gauze. Position cutting instruments like scalers or drills on the right side for easy access‚ while material-handling tools like cotton pliers remain accessible but separate. Ensure the tray is not overcrowded‚ with frequently used items in easy-to-reach spots. Cotton rolls or gauze can be placed across the top for quick access. Always maintain sterility and consult procedure lists or the dentist to verify completeness‚ ensuring efficient workflow and infection control.
4.4 Final Check for Completeness
Once the tray is set up‚ perform a final check to ensure all necessary instruments are present and properly organized. Verify the inclusion of basic instruments like mouth mirrors‚ explorers‚ and cotton pliers‚ as well as any procedure-specific tools. Ensure instruments are grouped by function and logically placed for easy access; Check that cotton rolls or gauze are arranged across the top and that all items are sterile and ready for use. Review the procedure list to confirm no items are missing. Finally‚ conduct a quick visual inspection to ensure the tray is tidy and all instruments are within reach; This step ensures efficiency and preparedness for the procedure.
Types of Dental Trays
Dental trays are categorized into hygiene‚ operative‚ and surgical setups‚ each tailored for specific procedures. They ensure efficiency by organizing instruments according to the procedure’s requirements.
5.1 Hygiene Tray Setup
The hygiene tray setup is specifically designed for routine dental cleanings and preventive procedures. It typically includes essential instruments such as the mouth mirror‚ explorer‚ and cotton pliers‚ which are placed on the left side for easy access. Additional items like scaling instruments and polishing pastes are organized to streamline the process. Cotton supplies are usually arranged across the top of the tray to maintain a clean and efficient workflow. This setup ensures that all necessary tools are within reach‚ allowing dental hygienists to focus on providing thorough and comfortable care for patients. Proper organization enhances efficiency and patient safety.
5.2 Operative Tray Setup
The operative tray setup is tailored for restorative and surgical procedures‚ requiring a comprehensive arrangement of instruments. It typically includes high-speed and low-speed handpieces‚ burs‚ excavators‚ and filling instruments‚ organized by function. Basic instruments like mouth mirrors and explorers are placed on the left‚ while procedure-specific tools are positioned on the right for easy access. Cotton rolls and suction devices are often arranged across the top to maintain a clean and efficient workflow. This setup ensures that all necessary tools are readily available‚ minimizing downtime and enhancing precision during complex procedures. Proper organization is key to maintaining sterility and efficiency‚ ensuring optimal patient care and outcomes.
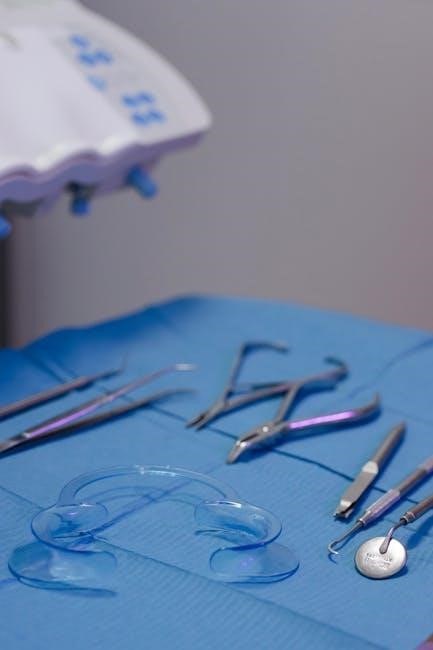
5.3 Surgical Tray Setup
The surgical tray setup is designed for invasive procedures‚ requiring precise organization of specialized instruments. It typically includes scalpels‚ surgical forceps‚ retractors‚ suction tips‚ and suture materials‚ arranged to ensure easy access during surgery. The setup often includes a separate section for sterile supplies‚ such as gloves and gauze‚ to maintain asepsis. Instruments are grouped by function‚ with cutting tools on one side and suction devices on the other. Additional items like cotton rolls and saline solution may be included for hemostasis and tissue management. This setup prioritizes efficiency and sterility‚ enabling seamless execution of complex surgical procedures while minimizing risks to patient safety.
Infection Control and Sterilization
Proper infection control and sterilization are critical in dental tray setup to prevent cross-contamination and ensure patient safety. Sterilization protocols must be strictly followed for all instruments and trays.
6.1 Maintaining Sterility During Setup
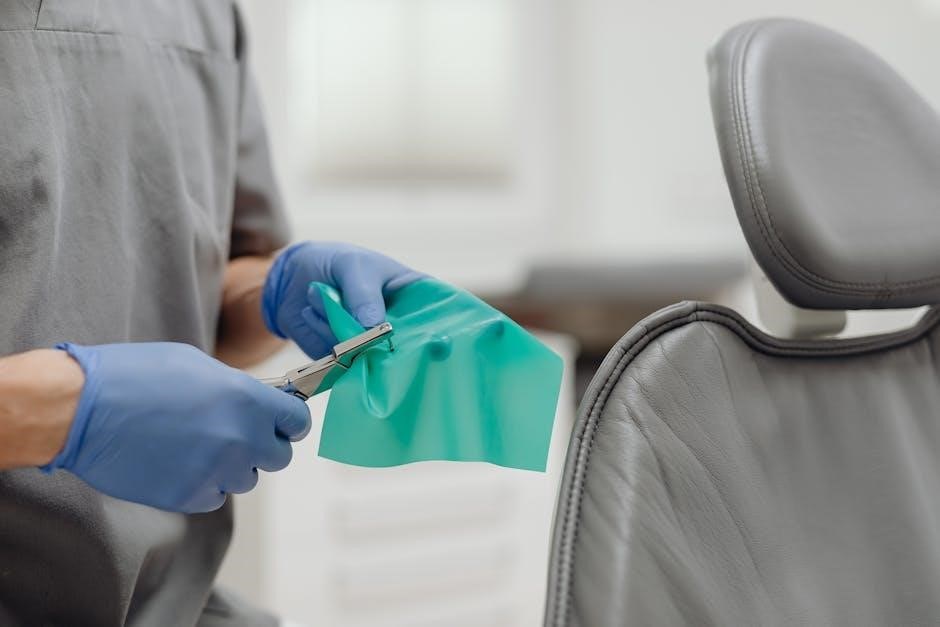
Maintaining sterility during dental tray setup is crucial to prevent cross-contamination and ensure patient safety. Always use sterilized instruments and follow strict aseptic techniques. Handle instruments by their handles to avoid touching contaminated areas. Use autoclave or chemical disinfection for sterilization‚ depending on the material. Place instruments on a sterile field or tray‚ ensuring they remain untouched once sterilized. Avoid reaching over instruments‚ as this can compromise sterility. Organize the tray in a way that prevents accidental contact with non-sterile surfaces. Use disposable barriers for non-sterile components. Double-check all items for sterility before proceeding with the procedure to ensure compliance with infection control standards.
6.2 Proper Handling of Instruments
Proper handling of instruments during tray setup is vital to maintain their integrity and functionality. Always pick up instruments by their handles to avoid touching the working ends‚ which can introduce contamination. Use gloved hands when handling sterile instruments to prevent skin oils from compromising sterility. Place instruments in the tray in a logical order‚ ensuring they are easily accessible during procedures. Avoid overcrowding the tray‚ as this can lead to instrument damage or accidental contamination. Store sharp instruments separately to prevent injury and damage. Regularly inspect instruments for wear or damage and replace them as needed to ensure optimal performance and patient safety.
6.3 Sterilization of the Tray and Instruments
Sterilization of the dental tray and instruments is critical to prevent infection and ensure patient safety. Autoclaving is the most common method‚ using high-pressure steam to kill pathogens. Chemical vaporization and UV light are alternative methods‚ though less effective. Instruments must be pre-cleaned to remove debris before sterilization. Arrange items in the autoclave basket to allow proper steam penetration. After sterilization‚ instruments should be stored in a dry‚ clean environment to maintain sterility. Regularly inspect and replace worn-out items to ensure effectiveness. Proper sterilization protocols are essential for compliance with infection control standards and to uphold the highest level of patient care in dental settings.

Efficiency and Workflow
Proper tray setup enhances efficiency by streamlining procedures‚ reducing downtime‚ and ensuring timely access to instruments‚ ultimately improving patient safety and overall dental practice productivity.
7.1 Streamlining Dental Procedures
Streamlining dental procedures begins with a well-organized tray setup‚ ensuring instruments are grouped by function and placed logically for easy access. This reduces delays during treatments‚ allowing dental professionals to focus on patient care. By arranging essential tools like mouth mirrors‚ explorers‚ and cotton pliers on the left side‚ the workflow becomes more intuitive. Cotton supplies‚ placed across the top‚ are readily available without disrupting the procedure. A consistent setup for hygiene‚ operative‚ or surgical trays ensures the dental team can anticipate instrument locations‚ saving time and effort. This systematic approach not only enhances efficiency but also elevates the quality of patient care and reduces operational stress.
7.2 Reducing Downtime Between Procedures
Efficient tray setup plays a critical role in minimizing downtime between dental procedures. A well-prepared tray ensures that instruments are clean‚ sterilized‚ and immediately available‚ reducing delays. Organizing instruments by function and maintaining a consistent layout allows the dental team to transition smoothly between patients. Cotton supplies‚ such as rolls and gauze‚ should be replenished promptly to avoid interruptions. Additionally‚ pre-setting trays for common procedures and having backup supplies ready can further reduce downtime. Proper infection control practices‚ such as maintaining sterility and efficient cleaning‚ also contribute to a seamless workflow. By streamlining these processes‚ dental teams can maximize productivity and provide uninterrupted patient care.
7.3 Enhancing Patient Safety
Proper dental tray setup significantly enhances patient safety by ensuring all instruments are sterilized and organized. This prevents cross-contamination and reduces the risk of infections. Placing instruments in a logical order minimizes the chance of accidental injuries during procedures. Clearly visible and accessible supplies‚ such as cotton rolls and gauze‚ help maintain asepsis. Additionally‚ having emergency supplies readily available ensures quick response to unexpected situations. A well-prepared tray also reduces procedural errors‚ ensuring treatments are performed efficiently and safely. By adhering to strict infection control protocols and maintaining organization‚ dental assistants play a vital role in safeguarding patient health and well-being during dental procedures.
Advanced Tray Setup Techniques
Advanced techniques involve customizing trays for specific cases‚ incorporating modern instruments‚ and utilizing exercises to refine setup skills‚ enhancing efficiency and adaptability in complex procedures.
8.1 Customizing Trays for Specific Cases
Customizing trays for specific dental procedures ensures efficiency and precision. For instance‚ a surgical tray may include additional instruments like suture kits and surgical scalers‚ while an operative tray might focus on restorative tools. By tailoring the setup to the procedure‚ dental assistants can anticipate the dentist’s needs‚ reducing downtime. This customization also enhances patient safety by ensuring all necessary items are sterilized and within reach. Advanced techniques involve analyzing the procedure’s requirements and adapting the tray layout accordingly‚ making it a crucial skill for experienced dental assistants aiming to optimize workflow and deliver high-quality care.
8.2 Incorporating Modern Instruments
Incorporating modern instruments into dental tray setups enhances efficiency and precision. Advanced tools like digital probes and high-magnification mirrors improve diagnostic accuracy‚ while ergonomic designs reduce fatigue. Modern instruments often feature antimicrobial coatings‚ aiding in infection control. Additionally‚ some tools are designed for specific procedures‚ such as implant placement or cosmetic dentistry. Staying updated with the latest advancements ensures dental assistants can adapt tray setups to meet evolving clinical demands. Proper training and familiarization with these instruments are essential to integrate them seamlessly into daily workflows‚ ultimately improving patient outcomes and streamlining procedures.
8.3 Utilizing Tray Setup Exercises
Tray setup exercises play a crucial role in refining skills and ensuring readiness for various dental procedures. These exercises often include mock setups‚ where assistants practice organizing instruments for different scenarios. Regular practice enhances muscle memory and improves speed‚ allowing assistants to focus on patient care during actual procedures. Exercises may also involve problem-solving‚ such as identifying missing tools or optimizing tray layout. Additionally‚ group activities or competitions can foster teamwork and knowledge sharing. By consistently engaging in tray setup exercises‚ dental assistants maintain proficiency‚ adapt to new techniques‚ and contribute to a smooth‚ efficient workflow in the dental office.

Resources and Guides
Comprehensive guides and downloadable PDFs offer detailed instructions and visual aids for mastering tray setup. These resources include step-by-step tutorials‚ exercises‚ and photographs to ensure clarity and proficiency.
9.1 Downloading the Comprehensive PDF Guide
The comprehensive PDF guide offers an in-depth look at dental assistant tray setup‚ providing detailed instructions‚ visual aids‚ and step-by-step procedures. It covers essential instruments‚ organization techniques‚ and infection control measures. Designed for both students and experienced professionals‚ this guide ensures proficiency in creating efficient and safe tray setups. By downloading this resource‚ dental assistants can access practical exercises and photographs to enhance their skills. The guide is regularly updated to reflect modern practices and equipment‚ making it an invaluable tool for continuous learning and professional development in dental care settings.
9.2 Step-by-Step Instructions for Setup
Step-by-step instructions guide dental assistants through the process of setting up trays efficiently. Start with the basic setup‚ placing essential instruments like the mouth mirror‚ explorer‚ and cotton pliers on the left side. Group instruments by function‚ such as carvers together‚ to streamline access. Arrange cotton supplies across the top for easy reach. For specific procedures‚ add instruments like scalpels or sutures as needed. Ensure all items are sterile and within reach to minimize downtime. These instructions emphasize logical placement‚ reducing clutter‚ and maintaining order to enhance workflow and patient safety. Following these steps ensures a well-organized tray tailored to each procedure.
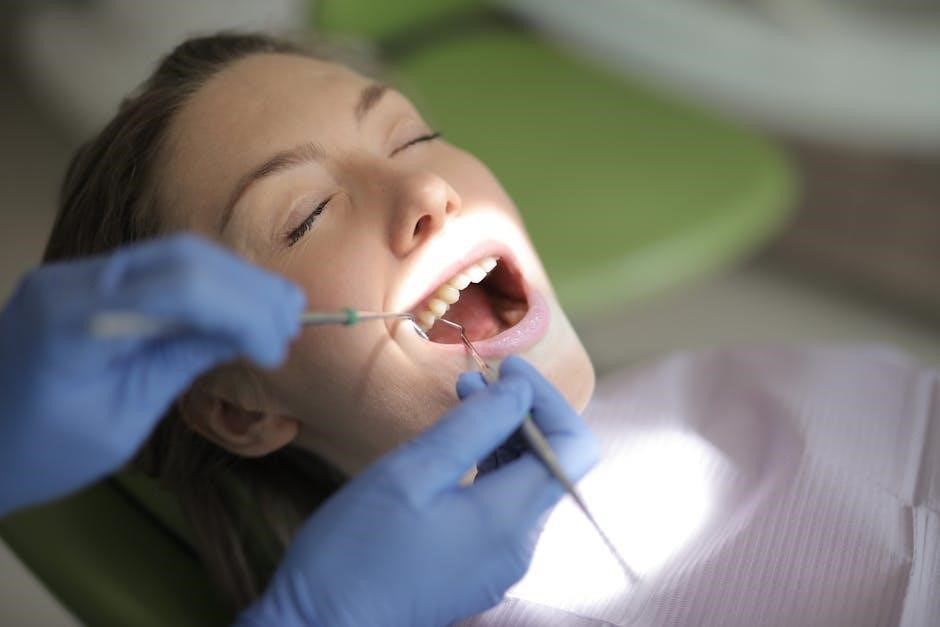
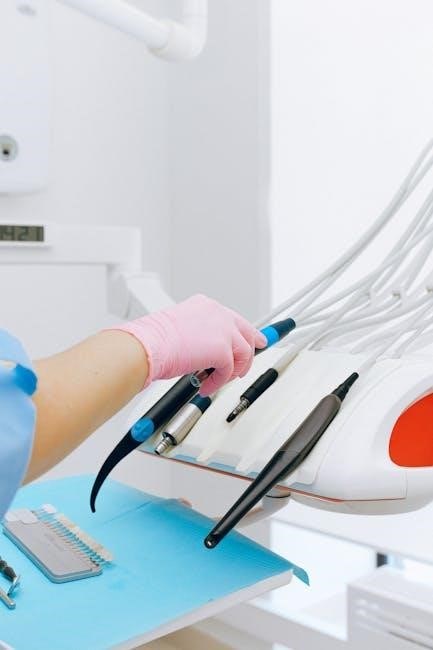
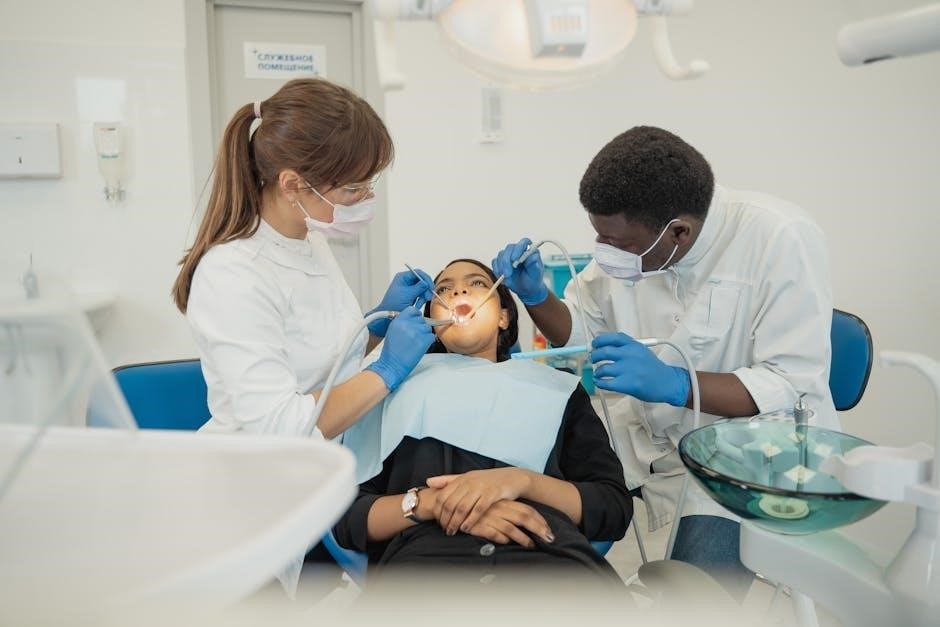
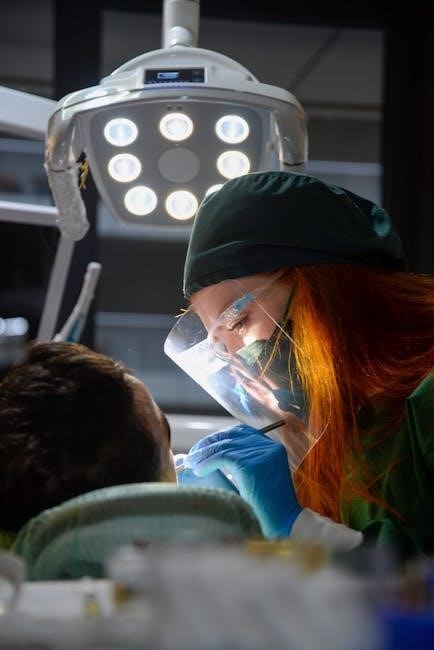
9.3 Visual Aids and Photographs for Clarity
Visual aids and photographs play a crucial role in enhancing understanding of dental tray setup. High-quality images provide clear examples of proper instrument arrangement‚ making complex instructions easier to follow. Detailed photographs showcase how instruments should be grouped by function and placed logically within the tray. These visuals cover various setups‚ such as hygiene‚ operative‚ and surgical trays‚ ensuring clarity for different procedures. Diagrams and infographics further illustrate the sequence of setup steps‚ while close-ups highlight specific instrument placements. This visual guidance is particularly beneficial for beginners‚ offering a practical reference to master tray organization. The combination of text and images ensures comprehensive learning and precise application in real-world settings.
Mastery of dental tray setup enhances efficiency‚ patient care‚ and workflow. Continuous learning and adaptation to modern techniques ensure optimal outcomes and professional growth in dental assisting.
10.1 Mastering the Art of Tray Setup
Mastery of dental tray setup is a cornerstone of effective dental assisting‚ enhancing workflow and patient care. Proper organization ensures instruments are accessible‚ reducing procedural delays. Grouping tools by function and placing them logically streamlines tasks; Attention to detail‚ such as including essentials like mouth mirrors and cotton pliers‚ is vital. Regular practice and understanding each instrument’s role are key to proficiency; A well-prepared tray not only boosts efficiency but also supports infection control and patient safety. By mastering this skill‚ dental assistants contribute significantly to successful outcomes and seamless operations in any clinical setting.
10.2 Continuous Learning and Improvement
Continuous learning and improvement are vital for dental assistants to stay updated with modern techniques and best practices in tray setup. The field of dentistry evolves rapidly‚ and staying informed about new instruments‚ procedures‚ and infection control protocols is essential. Engaging in workshops‚ online courses‚ and hands-on exercises can enhance skills and adaptability. Utilizing resources like the comprehensive PDF guide ensures access to the latest methods and visual aids. Regular practice and feedback from experienced professionals further refine tray organization and efficiency. Commitment to lifelong learning not only improves personal competence but also elevates the quality of patient care and operational excellence in dental settings.
10.3 Final Thoughts on Tray Setup Importance
Proper dental tray setup is a cornerstone of efficient and safe dental care‚ directly impacting procedure outcomes and patient satisfaction. A well-organized tray enhances workflow‚ reduces downtime‚ and ensures all necessary instruments are readily available. Mastery of tray setup demonstrates professionalism and attention to detail‚ contributing to a positive patient experience. By adhering to best practices and continuously adapting to new techniques‚ dental assistants play a pivotal role in maintaining high standards of care. Ultimately‚ the importance of tray setup lies in its ability to streamline operations‚ prioritize patient safety‚ and support the success of dental procedures. It is a skill that‚ when perfected‚ elevates the entire dental team’s effectiveness.
No Responses