Yamaha MG12Xu Mixer Manual: A Comprehensive Guide
This manual simplifies your Yamaha MG12Xu experience, detailing installation, operation, and maintenance for peak performance. It’s designed for optimal usability.
Welcome to the world of professional sound mixing with the Yamaha MG12Xu! This compact 12-channel mixer is engineered to deliver exceptional audio quality and versatility, making it ideal for a wide range of applications. From live performances and recording sessions to podcasting and home studio setups, the MG12Xu provides the tools you need to achieve pristine sound.
This manual serves as your comprehensive guide to unlocking the full potential of your new mixer. We’ll walk you through every aspect, from initial setup and understanding key features to advanced techniques for optimizing your sound. The MG12Xu is designed for ease of use, but a thorough understanding of its capabilities will significantly enhance your mixing experience. Prepare to explore a powerful and intuitive mixing solution!
Unboxing and Initial Setup
Carefully unpack your Yamaha MG12Xu mixer, ensuring all components are present: the mixer itself, a power cable, and this manual. Inspect for any visible damage sustained during shipping. Place the mixer on a stable, level surface with adequate ventilation. Connect the appropriate power cable and ensure it’s securely plugged into both the mixer and a grounded outlet.
Before powering on, verify your voltage setting matches your region. Initially, keep all channel faders and the master fader at their lowest positions. Power on the mixer and allow a few moments for it to initialize. Familiarize yourself with the layout – inputs, EQ controls, and outputs. You’re now ready to begin exploring the MG12Xu’s features!
MG12Xu Mixer: Key Features Overview
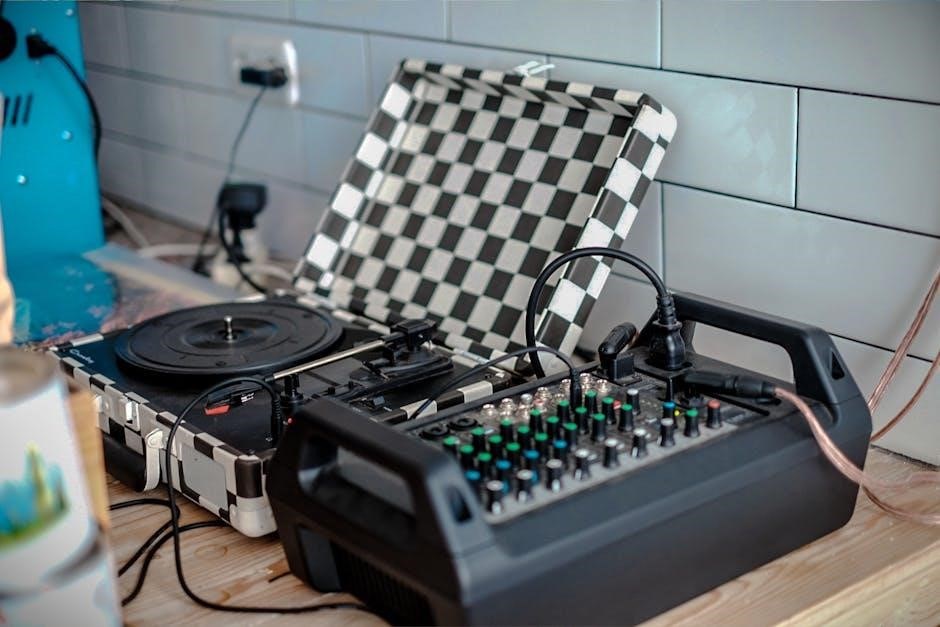
The Yamaha MG12Xu boasts 12 channels, offering versatile input options for microphones, instruments, and line-level sources. Its integrated USB audio interface enables direct recording and playback with your computer, simplifying music production. High-quality D-PRE preamplifiers deliver pristine, natural sound with low noise.
One-knob compressors on mono channels provide effortless dynamic control, while the 3-band EQ allows precise tonal shaping. Built-in digital effects, including reverb and delay, add professional polish to your sound. Phantom power supports condenser microphones, expanding your recording possibilities. The MG12Xu’s compact design and robust construction make it ideal for both studio and live applications.
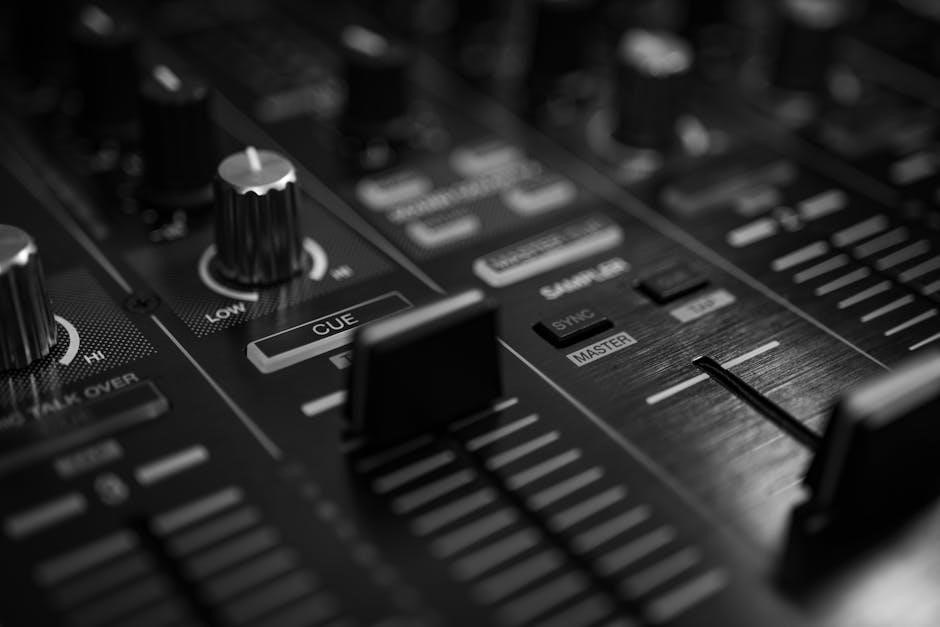
Understanding the MG12Xu’s Input Channels
The MG12Xu features a combination of mono and stereo input channels, providing flexibility for diverse audio sources. Mono channels 1-4 accept both microphone and line-level inputs, equipped with XLR and ¼-inch jacks. These channels include phantom power for condenser mics and gain control for optimal signal levels. Channels 5/6 and 7/8 are stereo line inputs, ideal for keyboards, synthesizers, or playback devices.
Each channel has a dedicated fader for volume adjustment and a pan control for stereo positioning. Input sensitivity switches optimize the signal-to-noise ratio. Understanding these channel configurations is crucial for achieving a balanced and professional mix. Careful attention to gain staging ensures clean, distortion-free audio.
Mono Microphone/Line Inputs
Channels 1-4 on the MG12Xu are versatile mono inputs, accommodating both microphones and line-level instruments. Each channel boasts an XLR input for microphones, offering professional connectivity and supporting phantom power (+48V) for condenser microphones. A ¼-inch TRS/TS jack provides line-level input for guitars, basses, or other instruments.
The ‘MIC/LINE’ switch selects the appropriate input source and optimizes gain staging. A gain control adjusts the input signal strength, ensuring a clean and strong signal. These inputs are fundamental for capturing vocals, acoustic instruments, and other mono audio sources with clarity and precision. Proper gain adjustment prevents clipping and maximizes audio quality.
Stereo Line Inputs
Channels 5-8 on the MG12Xu function as stereo line inputs, ideal for keyboards, synthesizers, drum machines, or stereo playback devices. These inputs utilize ¼-inch TRS jacks for left and right channels, providing balanced stereo connectivity. They are designed to handle higher-level signals without the need for pre-amplification, unlike the mono microphone inputs.
Each stereo channel features a dedicated gain control to adjust the input level for optimal signal-to-noise ratio. These inputs are perfect for integrating stereo sound sources directly into your mix, offering a wider and more immersive soundscape. Careful level adjustment is key to avoiding distortion and achieving a balanced stereo image.
MG12Xu: EQ and Signal Processing
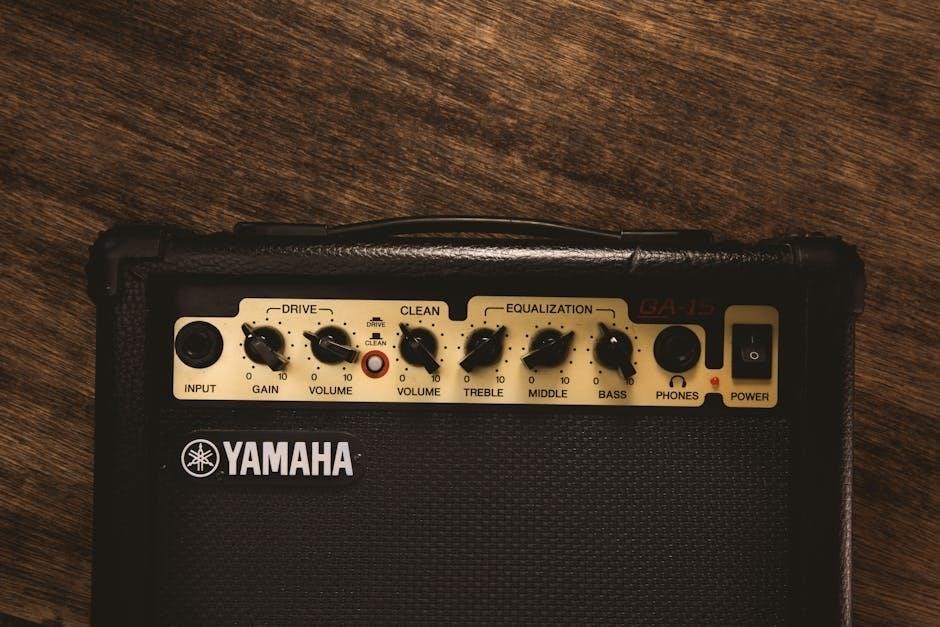
The Yamaha MG12Xu provides essential EQ and signal processing tools to shape your sound. Each channel boasts a 3-band EQ – High, Mid, and Low – allowing precise tonal adjustments. These controls enable you to cut or boost frequencies, addressing unwanted resonances or enhancing desired characteristics within each signal.
Furthermore, the MG12Xu incorporates Yamaha’s renowned one-knob compressors on the mono channels. These compressors simplify dynamic control, adding punch and clarity without complex settings. They automatically adjust compression ratio, attack, and release times, making professional-sounding results accessible to all users. These features are crucial for achieving a polished and balanced mix.

3-Band Equalizer Functionality
The MG12Xu’s 3-band EQ offers intuitive tonal shaping for each channel. High frequencies (typically above 6kHz) control brightness and air, while adjustments here can add clarity or reduce harshness. The Midrange (around 2.5kHz) impacts the body and presence of a sound; boosting enhances vocals, while cutting minimizes muddiness. Low frequencies (below 250Hz) define the bass and fullness – careful control prevents boominess.
Each band allows for both boosting (increasing the signal level) and cutting (decreasing the signal level). Subtle adjustments are often best, as excessive EQ can introduce unwanted artifacts. Experimentation is key to finding the optimal settings for each source, achieving a balanced and professional sound.

One-Knob Compressors – How They Work
Yamaha’s one-knob compressors simplify dynamic control on each MG12Xu channel. Turning the knob clockwise increases compression, reducing the difference between the loudest and quietest parts of a signal. This results in a more consistent level, preventing peaks from distorting and bringing quieter elements forward.
Essentially, it automatically adjusts the gain, making loud sounds quieter and quiet sounds louder. This is incredibly useful for vocals and instruments with a wide dynamic range. A subtle setting adds polish, while higher settings create a more pronounced, controlled sound. Experiment to find the sweet spot for each source, avoiding over-compression which can sound unnatural.
Using the MG12Xu’s Built-in Effects
The MG12Xu boasts a suite of 16 digital effects, adding depth and character to your audio. These are easily accessible via the dedicated FX control and select knob. Effects range from essential reverbs and delays to chorus, flanger, and more creative options.
To utilize an effect, first select the desired type using the FX select knob. Then, adjust the FX level to blend the effect with the dry signal. Start with a subtle setting and gradually increase until you achieve the desired ambiance. Remember, less is often more – overuse can muddy the mix. Experiment with different settings to discover the sonic possibilities!
Reverb and Delay Settings
The MG12Xu’s reverb effects simulate acoustic spaces, from small rooms to expansive halls. Adjust the ‘Time’ control to modify the decay length – shorter times create tighter spaces, while longer times evoke larger environments. Experiment with different reverb types for varied textures.
Delay settings allow you to create echoes. The ‘Feedback’ control determines how many repeats occur, and the ‘Time’ control sets the delay duration. Shorter delays create a doubling effect, while longer delays produce distinct echoes. Careful adjustment prevents muddiness. Combine reverb and delay for complex spatial effects, enhancing vocals or instruments.
Chorus and Other Effects Options
The MG12Xu offers a chorus effect, adding richness and a shimmering quality to sounds. Adjust the ‘Depth’ control to vary the intensity of the chorus, and the ‘Rate’ control to change the speed of the modulation. Subtle chorus enhances vocals, while deeper settings create a more pronounced effect.
Beyond chorus, the MG12Xu includes flanger and phaser effects for unique tonal colors. Flanger creates a sweeping, jet-plane-like sound, while phaser produces a swirling, psychedelic effect. Experiment with these options to add character to instruments or vocals. Remember to use effects tastefully, balancing creativity with clarity.
Connecting External Devices to the MG12Xu
The MG12Xu provides versatile connectivity for a wide range of audio sources. Utilize the XLR/TRS combo jacks for microphones and line-level instruments. Remember to engage phantom power (+48V) for condenser microphones, ensuring optimal signal quality. For instruments like guitars and keyboards, connect via the ¼-inch line inputs.
Stereo devices, such as CD players or synthesizers, can be connected using the stereo line inputs. Always match impedance levels for clean audio transfer. The MG12Xu’s flexible input configuration allows seamless integration with various external gear, expanding your sonic possibilities. Proper cable selection and connection techniques are crucial for minimizing noise and maximizing performance.
Microphone Connections & Phantom Power
Connecting microphones to the MG12Xu is straightforward using the XLR/TRS combo jacks. XLR connections are preferred for balanced signals, reducing noise interference. Ensure proper cable connections for optimal audio quality. The MG12Xu features switchable phantom power (+48V), essential for condenser microphones. Always disable phantom power when using dynamic microphones to prevent damage.
Activate phantom power only when a condenser microphone requiring it is connected. Incorrect phantom power usage can lead to microphone malfunction or unwanted noise. The indicator light confirms phantom power is engaged. Understanding microphone types and their power requirements is crucial for safe and effective operation with the MG12Xu.
Connecting Instruments (Guitar, Keyboard)
Instruments like guitars and keyboards connect to the MG12Xu via the line inputs, utilizing either 1/4″ TRS or TS cables. For guitars, direct connection is possible, though a DI box is recommended for impedance matching and signal optimization, especially for longer cable runs. Keyboards typically connect using TRS cables for a stereo signal.
Adjust the input gain carefully to avoid clipping or distortion. Lower gain settings are preferable initially, gradually increasing until a strong, clean signal is achieved. Remember to select the appropriate input channel and ensure the correct input source is chosen. Experiment with EQ settings to tailor the sound to your instrument’s characteristics and desired tone.
MG12Xu: USB Audio Interface Functionality
The MG12Xu functions as a USB audio interface, enabling direct recording and playback with a computer. This eliminates the need for a separate audio interface for basic recording tasks. Connect the mixer to your computer using a USB cable; the MG12Xu will be recognized as an audio device.
You may need to select the Yamaha USB Audio as your input/output device within your computer’s audio settings and your Digital Audio Workstation (DAW). Ensure the correct driver is installed for optimal performance. The USB connection transmits stereo audio, allowing for multi-track recording or stereo playback. Adjust levels carefully to prevent clipping during recording.
Setting Up the USB Connection

Establishing a USB connection with your computer is straightforward. First, connect a standard USB 2.0 (or higher) cable from the MG12Xu’s USB port to an available USB port on your computer. Upon connection, your computer should detect the Yamaha MG12Xu as an audio device;
If prompted, allow the computer to install the necessary drivers. Yamaha provides downloadable drivers on their website if automatic installation fails. Once recognized, navigate to your computer’s sound settings and select “Yamaha USB Audio” as both the input and output device. Verify functionality by playing audio from your computer and monitoring it through the MG12Xu’s main outputs.
Recording and Playback with a Computer
With the USB connection established, recording and playback become seamless. Launch your preferred Digital Audio Workstation (DAW) software – such as Audacity, GarageBand, or Pro Tools. Within your DAW, select “Yamaha USB Audio” as the audio interface. Configure input channels corresponding to the MG12Xu’s physical inputs you’re using for recording.

Arm the desired tracks for recording and begin capturing audio. For playback, route the DAW’s output back through the MG12Xu’s channels, allowing you to utilize the mixer’s EQ and effects. Monitor levels carefully to avoid clipping. Experiment with different recording configurations to achieve optimal sound quality and workflow.
Troubleshooting Common MG12Xu Issues
Encountering problems? This section addresses frequent MG12Xu issues. If you experience “no sound,” verify all cables are securely connected, power is on, and the correct input channels are selected. Check the main faders and ensure they aren’t muted or set to minimum. For feedback, lower channel gains and EQ frequencies prone to resonance.
Reduce monitor volume and reposition microphones away from speakers. If USB connectivity fails, reinstall the Yamaha USB driver. Always consult the manual’s troubleshooting guide for detailed solutions. Systematic checking of connections and settings usually resolves most common problems.
No Sound Troubleshooting
Complete silence? Let’s diagnose the issue. First, meticulously check all input and output cable connections – ensure they’re firmly seated. Confirm the MG12Xu has power and the power LED is illuminated. Verify the correct input channel is selected for your source. Crucially, check the channel faders; are they raised from the minimum position?
Inspect the main fader and ensure it isn’t muted or set too low. Confirm headphones are connected to the correct output and volume is adjusted. If using USB, verify the computer recognizes the mixer. A systematic approach, checking each element, will pinpoint the source of the problem.
Feedback Prevention Techniques
Unwanted howling? Feedback is a common issue, but manageable. Begin by ensuring microphone placement avoids direct line-of-sight to the speakers. Lowering microphone gain can significantly reduce the risk, as can reducing speaker volume. Utilize the MG12Xu’s EQ to identify and attenuate frequencies prone to feedback – often in the mid-range.
Experiment with high-pass filters on microphone channels to remove low-frequency rumble that can contribute; If using multiple microphones, careful positioning and gain staging are vital. Consider using directional microphones to reject sound from the speakers. A proactive approach to gain structure and microphone technique minimizes feedback occurrences.
MG12Xu Mixer: Maintenance and Care
To ensure longevity, regular cleaning is essential. Use a soft, dry cloth to wipe down the MG12Xu’s exterior, avoiding harsh chemicals or solvents. Dust accumulation can affect performance, so periodic cleaning inside (when powered off and unplugged) is recommended. Inspect cables regularly for damage – frayed wires can cause noise or signal loss.

Avoid exposing the mixer to extreme temperatures or humidity. When transporting, use a protective case to prevent physical damage. Keep the ventilation slots clear to prevent overheating. Proper care extends the life of your MG12Xu and maintains optimal audio quality. Routine checks are key to reliable operation.
Yamaha MG12Xu Specifications
The Yamaha MG12Xu boasts 12 input channels: 4 mono mic/line and 4 stereo line inputs. It features D-PRE microphone preamplifiers, known for their clarity and low noise. The mixer’s frequency response ranges from 20Hz to 20kHz. Total Harmonic Distortion is typically 0.005%.
Its USB audio interface supports 2-in/2-out recording and playback at 24-bit/192kHz. Phantom power is available at +48V. Dimensions are approximately 308 x 173 x 73 mm, and it weighs around 2;4 kg. Input impedance varies by channel type. These specifications ensure high-quality audio processing and versatile connectivity.
No Responses